How To Securely Connect Remote IoT Devices Using P2P SSH On Ubuntu: A Step-by-Step Guide
Hey there, tech enthusiasts! If you're diving into the world of IoT (Internet of Things), you might’ve already realized that securing your devices is as important as building them. Today, we’re going to talk about how to securely connect remote IoT devices using P2P SSH on Ubuntu. Yeah, you heard that right—Ubuntu, the go-to Linux distro for developers, hackers, and hobbyists alike. Whether you're managing smart home gadgets or industrial IoT systems, this guide’s got your back. Let’s get started!
Now, let’s face it—IoT devices are everywhere. From your smart fridge to industrial sensors, these little machines are collecting data and making life easier. But with convenience comes risk. Hackers love unsecured IoT devices, and that’s why understanding how to set up a secure connection is crucial. SSH (Secure Shell) is the golden ticket here, and pairing it with Ubuntu makes the process smoother than ever.
Before we dive into the nitty-gritty, let’s address the elephant in the room: Why SSH? Simple—it’s secure, reliable, and widely supported. Plus, when you combine it with P2P (Peer-to-Peer) connectivity, you’ve got a setup that’s not only secure but also efficient. So, buckle up, because we’re about to show you how to do it right!
Read also:Jules Ari Leaked Of The Inside Scoop You Need To Know
Understanding the Basics: What is SSH and Why Does It Matter?
First things first—let’s break down what SSH actually is. SSH, or Secure Shell, is a cryptographic network protocol that allows you to securely access remote devices over an unsecured network. Think of it as a secret tunnel that lets you communicate with your IoT devices without anyone eavesdropping. Pretty cool, huh?
SSH is especially useful for IoT because these devices often live outside your local network, meaning they’re exposed to the internet. Without proper security measures, they’re sitting ducks for cyberattacks. By using SSH, you can ensure that your data remains private and your devices remain under your control.
Why Use Ubuntu for IoT SSH Connections?
Ubuntu is one of the most popular Linux distributions for a reason—it’s stable, secure, and developer-friendly. When it comes to IoT, Ubuntu shines because:
- It’s lightweight enough to run on small devices.
- It has robust security features out of the box.
- It’s compatible with a wide range of tools and frameworks.
Plus, the Ubuntu community is massive, so if you run into trouble, chances are someone’s already solved the problem you’re facing. Win-win!
Setting Up Your Environment: Prerequisites and Tools
Before we jump into the setup process, let’s make sure you’ve got everything you need. Here’s what you’ll need to get started:
- An Ubuntu server or device (can be physical or virtual).
- A remote IoT device with SSH capabilities.
- A stable internet connection (duh).
- Basic knowledge of Linux commands and networking concepts.
If you’re missing any of these, don’t panic! There are tons of tutorials online to help you catch up. Just make sure you’re comfortable with the basics before moving forward.
Read also:Marcelene Dyer The Rising Star Redefining Modern Success
Installing SSH on Ubuntu
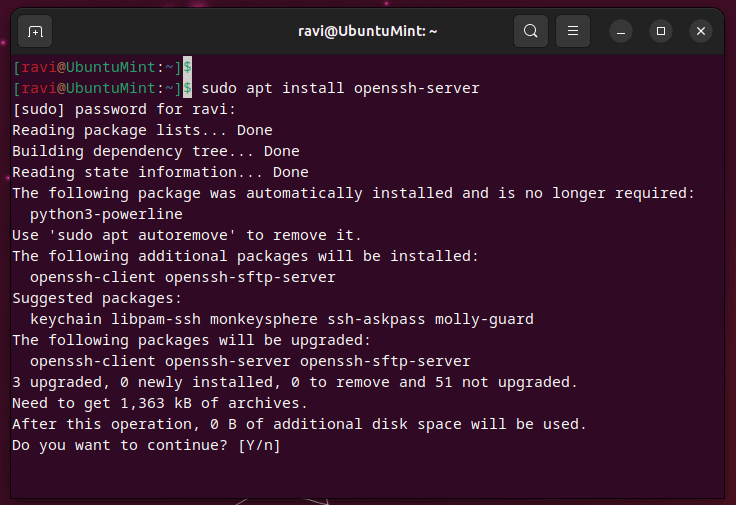
Alright, let’s get our hands dirty. The first step is to install SSH on your Ubuntu system. Here’s how you do it:
- Open your terminal. Yeah, that’s right—no GUI here.
- Run the following command to install OpenSSH:
sudo apt update && sudo apt install openssh-server. - Once the installation is complete, check if SSH is running by typing:
sudo systemctl status ssh.
If everything’s good, you should see a message saying that SSH is active and running. Congrats—you’re one step closer to securing your IoT setup!
Configuring SSH for Secure Connections
Installing SSH is just the beginning. To make sure your connections are as secure as possible, you’ll need to tweak some settings. Here’s how:
1. Disable Password Authentication
Passwords are great, but they’re also a common attack vector. Instead, use SSH keys for authentication. Here’s how you generate and use SSH keys:
- Generate a key pair by running:
ssh-keygen -t rsa -b 4096. - Copy your public key to the remote device:
ssh-copy-id user@remote_device_ip. - Disable password authentication by editing the SSH config file:
sudo nano /etc/ssh/sshd_config. - Find the line that says
PasswordAuthentication yesand change it toPasswordAuthentication no. - Restart the SSH service:
sudo systemctl restart ssh.
Boom! You’ve just added an extra layer of security to your setup.
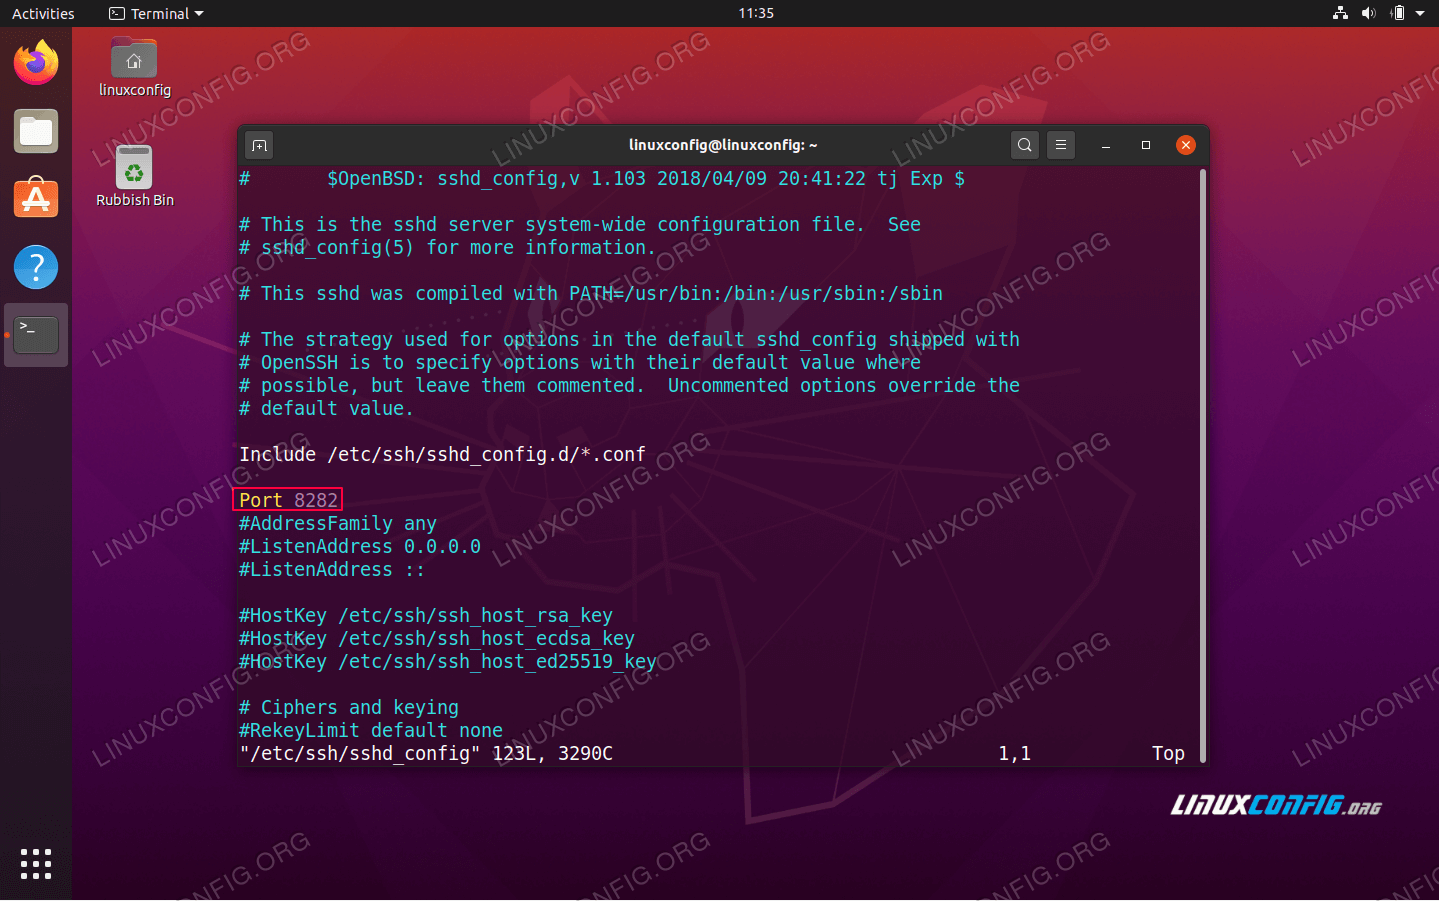
2. Change the Default SSH Port
Attackers love targeting the default SSH port (22). To throw them off, change it to something less obvious:
- Edit the SSH config file:
sudo nano /etc/ssh/sshd_config. - Find the line that says
Port 22and change it to a different number (e.g.,Port 2222). - Restart the SSH service:
sudo systemctl restart ssh.
Now, attackers will have a harder time finding your SSH port. Sneaky, right?
Implementing P2P SSH for IoT Devices
Peer-to-Peer (P2P) connectivity is a game-changer for IoT devices. Instead of relying on a central server, devices can communicate directly with each other. Here’s how you can set it up:
Step 1: Set Up a Reverse SSH Tunnel
A reverse SSH tunnel allows you to access a remote device even if it’s behind a firewall. Here’s how:
- On the remote device, run:
ssh -R 2022:localhost:22 user@your_ubuntu_server. - This command forwards port 2022 on your Ubuntu server to port 22 on the remote device.
Now, you can access the remote device by connecting to your Ubuntu server on port 2022.
Step 2: Automate the Connection
Manually setting up the tunnel every time is a pain. To automate the process, use a tool like autossh:
- Install autossh:
sudo apt install autossh. - Create a systemd service file to start the tunnel automatically on boot.
With autossh, your tunnel will stay up even if the connection drops. How’s that for convenience?
Example: Connecting a Smart Home Sensor
Let’s say you’ve got a smart home sensor running on a Raspberry Pi with Ubuntu. Here’s how you’d connect it securely:
- Install SSH on the Raspberry Pi as described earlier.
- Set up a reverse SSH tunnel to your main Ubuntu server.
- Access the sensor from anywhere by connecting to your server on the forwarded port.
Voilà! Your smart home sensor is now securely connected to your network.
Troubleshooting Common Issues
Even the best-laid plans can go wrong. If you run into problems, here are some tips:
- Check your firewall settings to ensure SSH traffic is allowed.
- Verify that the SSH service is running on both devices.
- Double-check your SSH config file for typos or misconfigurations.
If all else fails, Google is your friend. Seriously, don’t hesitate to ask for help when you need it.
Best Practices for Securing IoT Devices
SSH is just one piece of the puzzle when it comes to IoT security. Here are some additional best practices to keep your devices safe:
- Keep your firmware and software up to date.
- Use strong, unique passwords for all accounts.
- Limit access to only trusted devices and users.
- Monitor your devices regularly for suspicious activity.
By following these practices, you can significantly reduce the risk of cyberattacks on your IoT setup.
Conclusion: Take Action and Secure Your IoT Devices Today
There you have it—a comprehensive guide to securely connecting remote IoT devices using P2P SSH on Ubuntu. From setting up SSH to implementing P2P connectivity, we’ve covered everything you need to know to keep your devices safe and secure.
Now it’s your turn! Take what you’ve learned and apply it to your own IoT projects. Whether you’re building a smart home or managing industrial sensors, remember that security should always be a top priority.
And hey, don’t forget to share this article with your fellow tech enthusiasts. Knowledge is power, and together we can make the IoT world a safer place. Happy coding, and stay secure!
Table of Contents
- Understanding the Basics: What is SSH and Why Does It Matter?
- Why Use Ubuntu for IoT SSH Connections?
- Setting Up Your Environment: Prerequisites and Tools
- Configuring SSH for Secure Connections
- Implementing P2P SSH for IoT Devices
- Example: Connecting a Smart Home Sensor
- Best Practices for Securing IoT Devices
- Conclusion: Take Action and Secure Your IoT Devices Today


, you might’ve already realized that securing your devices is as i)