Mastering Remote IoT Device SSH Tutorial: Your Ultimate Guide
Welcome to the world of remote IoT device management! If you've ever wondered how to securely access and control your Internet of Things (IoT) devices from anywhere, you're in the right place. This article dives deep into the remote IoT device SSH tutorial, offering practical tips, step-by-step guides, and expert insights to help you master this essential skill. Whether you're a tech enthusiast or a seasoned professional, this guide has everything you need to get started.
Let’s face it, IoT devices are everywhere these days. From smart thermostats to industrial sensors, these gadgets are revolutionizing the way we live and work. But with great power comes great responsibility. Securing your IoT devices is crucial, and that’s where SSH (Secure Shell) comes in. SSH is like a digital lock that keeps your devices safe from prying eyes.
In this article, we’ll explore the ins and outs of using SSH for remote IoT device management. You’ll learn everything from setting up SSH on your devices to troubleshooting common issues. So buckle up, because we’re about to embark on a journey into the fascinating world of remote IoT device management!
Read also:Galigool The Ultimate Guide To Mastering This Trending Concept
Understanding SSH and Its Role in IoT
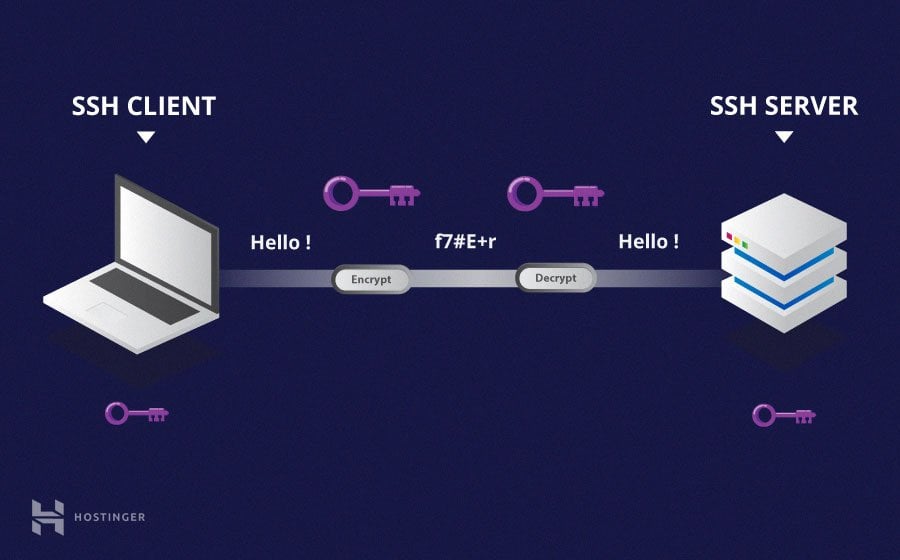
Before we dive into the nitty-gritty of the remote IoT device SSH tutorial, let’s take a moment to understand what SSH is and why it’s so important in the world of IoT. SSH stands for Secure Shell, and it’s a network protocol that allows you to securely access and manage remote devices over an unsecured network like the internet. Think of it as a digital tunnel that keeps your data safe while it travels from your computer to your IoT device.
SSH is a game-changer for IoT because it provides a secure way to manage devices that are often located in remote or inaccessible locations. Whether you’re monitoring a weather station in the middle of nowhere or managing a fleet of smart devices in a factory, SSH ensures that your data remains confidential and your devices remain under your control.
Why SSH Matters for IoT Devices
Here’s why SSH is a must-have for anyone working with IoT devices:
- **Security**: SSH encrypts all data transmitted between your computer and your IoT device, making it nearly impossible for hackers to intercept your communications.
- **Reliability**: SSH connections are stable and reliable, even over long distances or unstable networks.
- **Flexibility**: SSH allows you to perform a wide range of tasks, from running commands to transferring files, all from the comfort of your desk.
- **Scalability**: Whether you’re managing one device or a thousand, SSH can handle it with ease.
Now that you know why SSH is so important, let’s move on to the next step: setting up SSH on your IoT device.
Setting Up SSH on Your IoT Device
Setting up SSH on your IoT device is easier than you might think. In this section, we’ll walk you through the process step by step. By the end of this section, you’ll have your IoT device ready for remote access via SSH. Let’s get started!
What You’ll Need
Before you begin, make sure you have the following:
Read also:Ali Larter Nudes The Truth Behind The Headlines And Sensational Stories
- An IoT device with SSH capabilities (most modern IoT devices come with SSH pre-installed).
- A computer with an SSH client installed (most operating systems, including Windows, macOS, and Linux, come with SSH clients built in).
- A stable internet connection.
- Your IoT device’s IP address or hostname.
Step-by-Step Guide
Here’s how to set up SSH on your IoT device:
**Enable SSH on Your IoT Device**: Depending on your device, you may need to enable SSH in the settings menu. Check your device’s user manual for instructions.
**Find Your Device’s IP Address**: You’ll need your IoT device’s IP address to connect to it via SSH. You can usually find this information in the device’s settings or by checking your router’s admin page.
**Install an SSH Client**: If your computer doesn’t already have an SSH client installed, you can download one like PuTTY for Windows or use the built-in Terminal app on macOS and Linux.
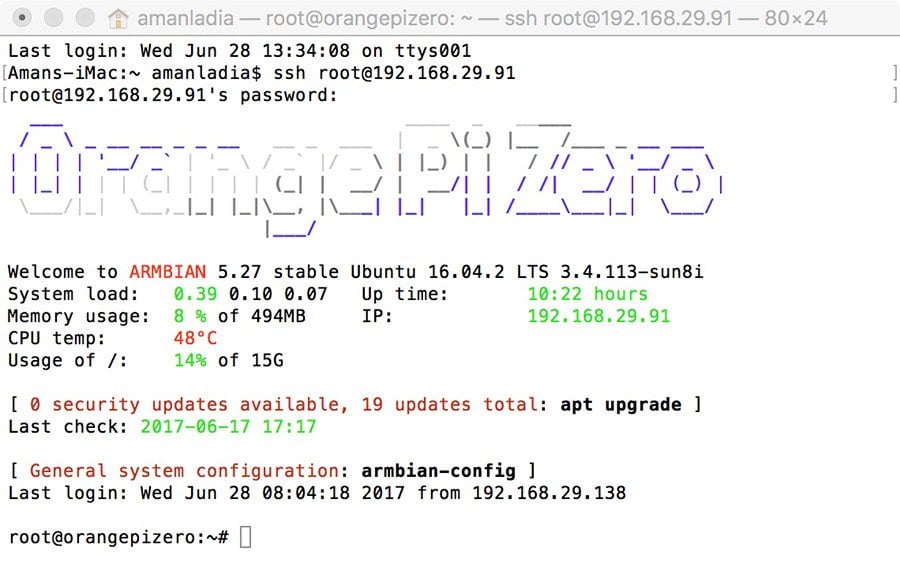
**Connect to Your Device**: Open your SSH client and enter your device’s IP address or hostname. You’ll also need to provide a username and password (or use an SSH key for added security).
That’s it! You’re now connected to your IoT device via SSH. In the next section, we’ll explore some advanced features and tips to help you get the most out of your SSH connection.
Advanced SSH Features for IoT Devices
Once you’ve got the basics down, it’s time to explore some of the more advanced features of SSH that can make your life easier when working with IoT devices. From SSH keys to port forwarding, these features can enhance your security and productivity.
Using SSH Keys for Authentication
Passwords are great, but they’re not the most secure way to authenticate your SSH connections. That’s where SSH keys come in. SSH keys are like digital keys that allow you to log in to your IoT device without entering a password every time.
Here’s how to set up SSH keys:
- Generate a key pair using a tool like ssh-keygen.
- Copy your public key to your IoT device.
- Use your private key to log in to your device.
Not only are SSH keys more secure than passwords, but they also save you time by eliminating the need to enter a password every time you connect.
Port Forwarding with SSH
Port forwarding is another powerful feature of SSH that allows you to access services running on your IoT device from your computer. For example, you could use port forwarding to access a web server running on your IoT device from your browser.
Here’s how to set up port forwarding:
- Open your SSH client and add the -L flag followed by the port number and hostname.
- Connect to your IoT device as usual.
- Access the service on your computer by navigating to localhost:port in your browser.
Port forwarding is a great way to securely access services running on your IoT device without exposing them to the internet.
Best Practices for Remote IoT Device Management
Managing IoT devices remotely can be a challenge, but with the right tools and techniques, it can be a breeze. In this section, we’ll share some best practices for remote IoT device management that will help you stay organized and secure.
Regularly Update Your Devices
Keeping your IoT devices up to date is one of the best ways to ensure their security and reliability. Regular updates can fix bugs, patch vulnerabilities, and add new features that make your devices more powerful and secure.
Use Strong Passwords and SSH Keys
Strong passwords and SSH keys are your first line of defense against unauthorized access. Make sure your passwords are long, complex, and unique, and consider using a password manager to keep track of them. For added security, use SSH keys whenever possible.
Monitor Your Devices
Regularly monitoring your IoT devices can help you catch potential issues before they become serious problems. Use tools like log analyzers and network monitoring software to keep an eye on your devices and their activity.
Common Issues and Troubleshooting
Even with the best tools and techniques, things can go wrong when managing IoT devices remotely. In this section, we’ll explore some common issues you might encounter and how to troubleshoot them.
Connection Issues
If you’re having trouble connecting to your IoT device via SSH, here are a few things to check:
- Make sure your device is powered on and connected to the internet.
- Verify that SSH is enabled on your device.
- Check that your IP address or hostname is correct.
- Ensure that your firewall or router isn’t blocking SSH traffic.
Authentication Issues
If you’re having trouble authenticating your SSH connection, try the following:
- Double-check your username and password.
- Make sure your SSH keys are correctly configured.
- Check that your device’s SSH server is properly configured.
Security Considerations for Remote IoT Devices
Security is a top priority when managing IoT devices remotely. In this section, we’ll discuss some key security considerations to keep in mind when using SSH to access your devices.
Firewall and Network Security
Using a firewall and securing your network can help protect your IoT devices from unauthorized access. Make sure your router and firewall are properly configured to block unwanted traffic and only allow trusted connections.
Regular Audits and Logs
Regularly auditing your devices and reviewing logs can help you identify potential security threats before they become serious problems. Use tools like log analyzers to monitor your devices’ activity and detect any suspicious behavior.
Real-World Applications of Remote IoT Device SSH
Now that you know the basics of remote IoT device SSH, let’s explore some real-world applications of this powerful technology. From smart homes to industrial automation, SSH is used in a wide range of industries to manage and secure IoT devices.
Smart Home Automation
SSH is a popular choice for managing smart home devices like thermostats, security cameras, and lighting systems. With SSH, you can securely access and control your devices from anywhere, making it easy to automate your home and save energy.
Industrial Automation
In the industrial sector, SSH is used to manage and monitor sensors, controllers, and other IoT devices that are critical to manufacturing and production processes. SSH ensures that these devices remain secure and reliable, even in harsh environments.
Conclusion: Take Action and Secure Your IoT Devices
That’s it for our remote IoT device SSH tutorial! We’ve covered everything from the basics of SSH to advanced features and best practices for managing IoT devices remotely. By following the tips and techniques outlined in this article, you can securely access and control your IoT devices from anywhere in the world.
So what are you waiting for? Take action today by setting up SSH on your IoT devices and exploring the many possibilities it offers. And don’t forget to share this article with your friends and colleagues who are also interested in IoT and cybersecurity. Together, we can make the world of IoT a safer and more connected place!
Table of Contents
- Understanding SSH and Its Role in IoT
- Setting Up SSH on Your IoT Device
- Advanced SSH Features for IoT Devices
- Best Practices for Remote IoT Device Management
- Common Issues and Troubleshooting
- Security Considerations for Remote IoT Devices
- Real-World Applications of Remote IoT Device SSH
- Conclusion: Take Action and Secure Your IoT Devices


 devices from anyw)